See The Process
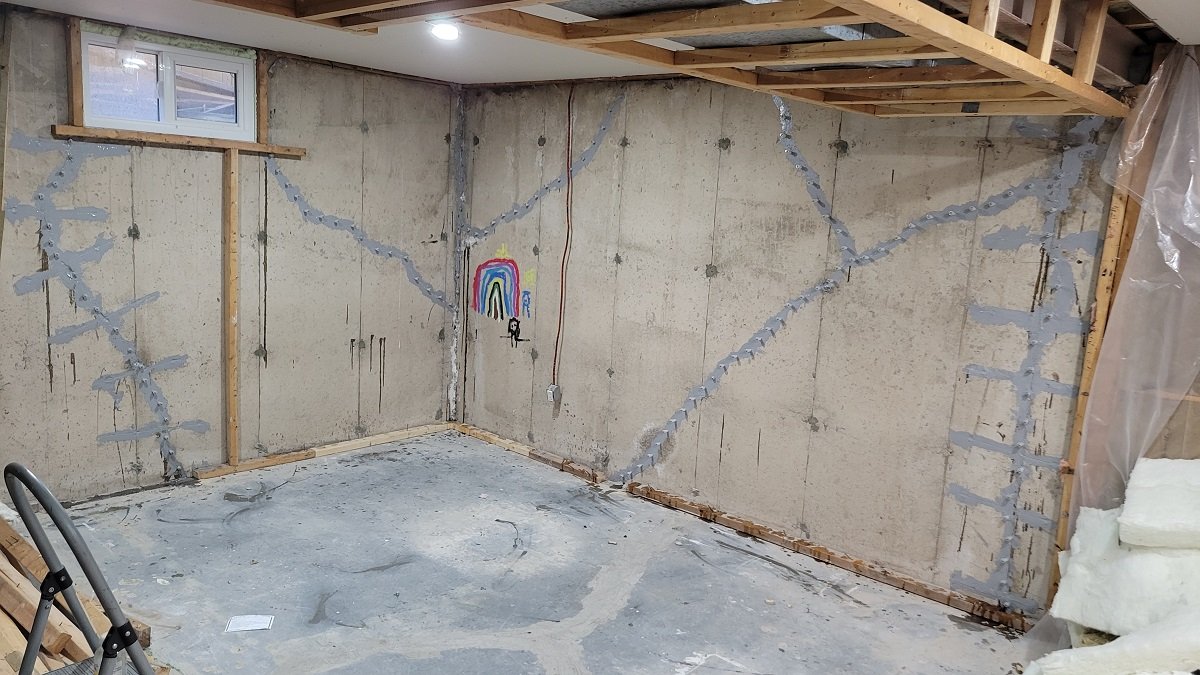
Evaluate the basement
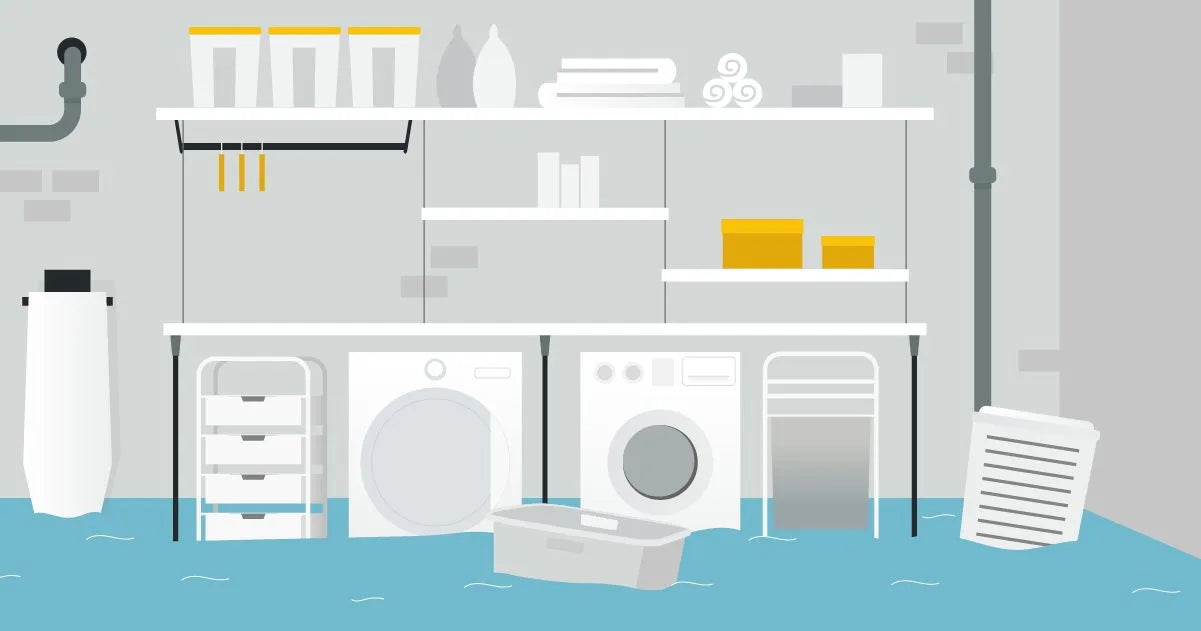
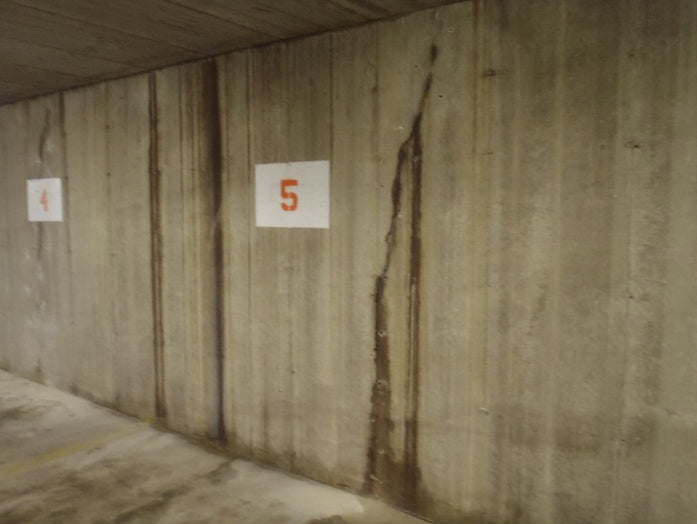
We begin by thoroughly inspecting the basement for signs of water infiltration, such as cracks, dampness, or efflorescence. We identify the areas that require waterproofing and determine the best approach for injection.
Prepare the work area
We clear the area around the crack, ensuring it is clean and free of any debris, loose material, or contaminants. We use a wire brush or other appropriate tools to clean the crack and remove any loose concrete particles.
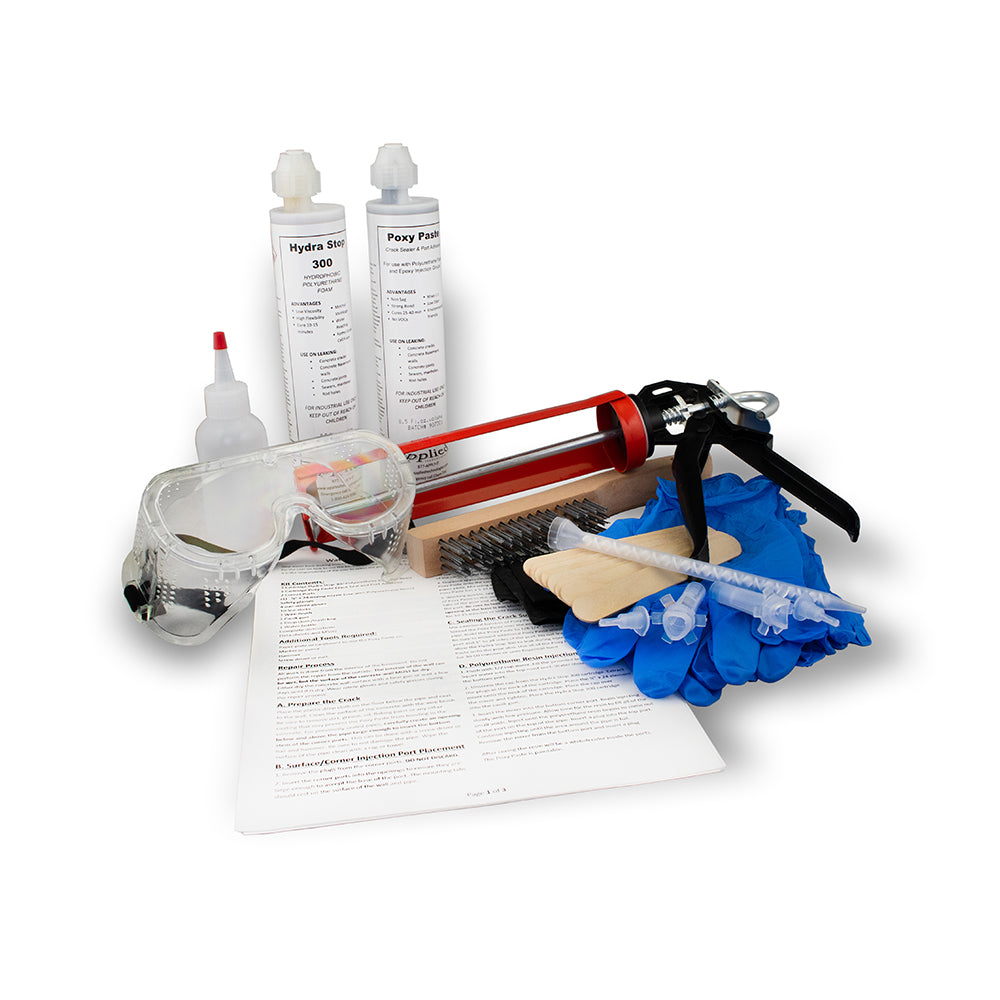
Select the injection material
We choose the appropriate injection material based on the type of crack, its width, depth, and other factors. Epoxy resins, polyurethane foam, or acrylic gels are commonly used materials for basement injections. We follow the manufacturer's instructions and mix the material accordingly.
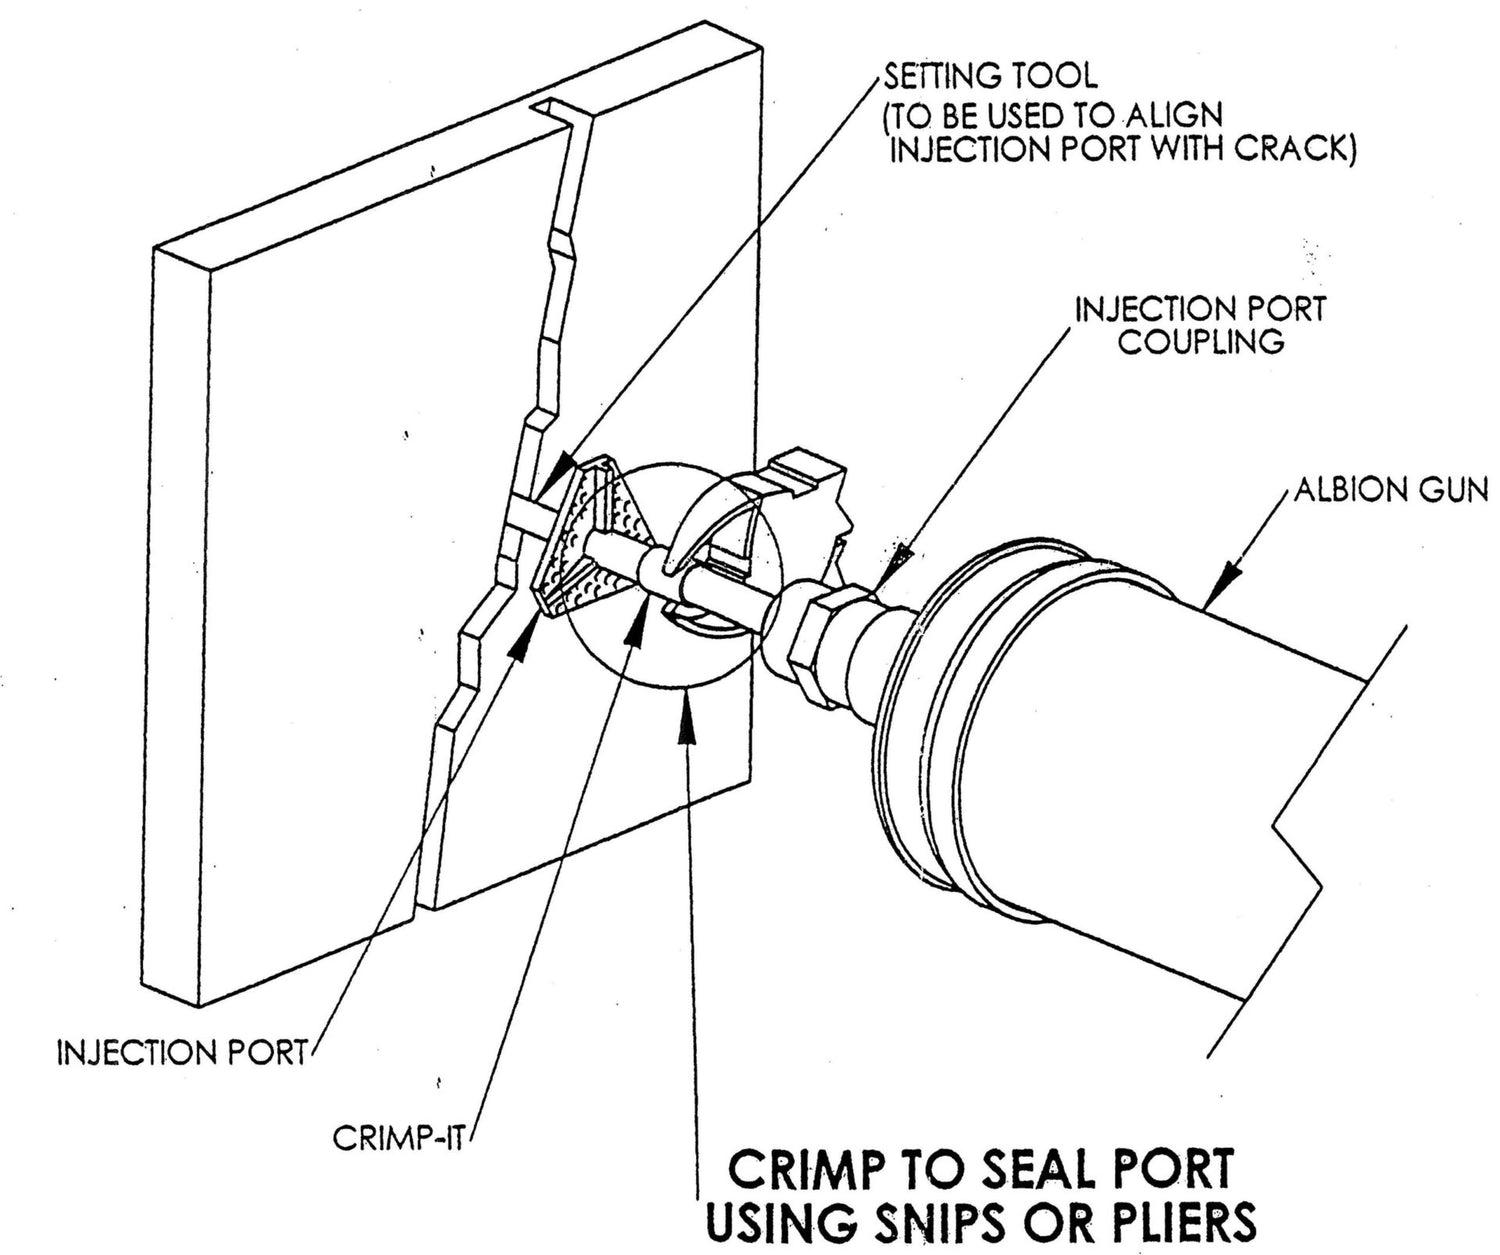
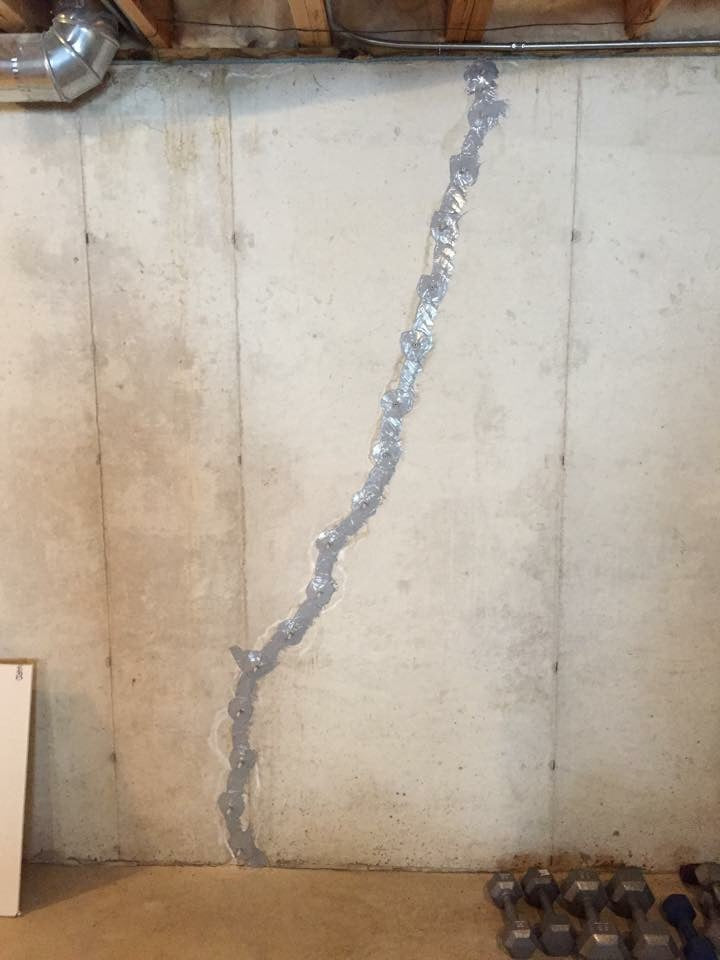
Drill injection ports
Using a masonry drill, we carefully drill injection ports along the length of the crack. The spacing between the ports will depend on the size and nature of the crack. We ensure the holes are clean and slightly larger than the injection ports. We insert the injection ports into the drilled holes. We ensure they are securely placed and flush with the surface of the basement wall or floor. If there are surface cracks or gaps, we apply a suitable sealant or epoxy paste to ensure a watertight seal before proceeding with the injection.
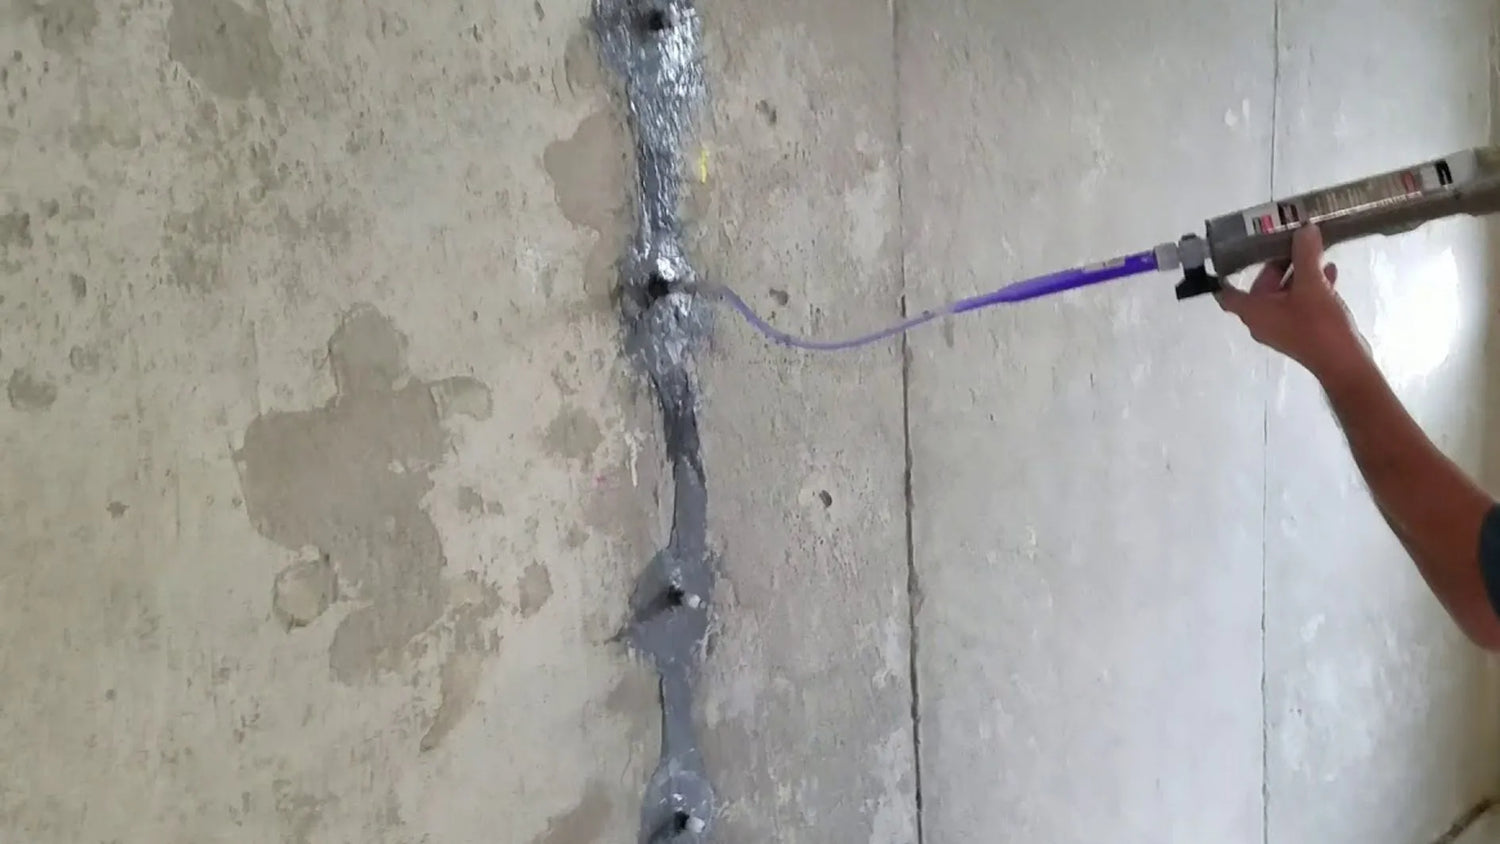
Injecting the material
Using an injection gun or pump, we begin injecting the selected material into the ports. We start from the lowest point and work our way up, gradually increasing the pressure to fill the crack completely. We monitor the injection process and adjust the pressure as needed to ensure proper filling and even distribution of the material.
Allow for curing and cleanup
Once the crack is filled, we allow the injected material to cure as per the manufacturer's instructions. This may involve waiting for a specific duration to achieve optimal strength and adhesion. We clean up any excess material and ensure the work area is tidy.
Test for effectiveness
After the injection has cured, we perform a water test to verify the effectiveness of the waterproofing and injections. We apply water to the repaired area and observe for any signs of leakage or water seepage. We address any issues that arise during testing.
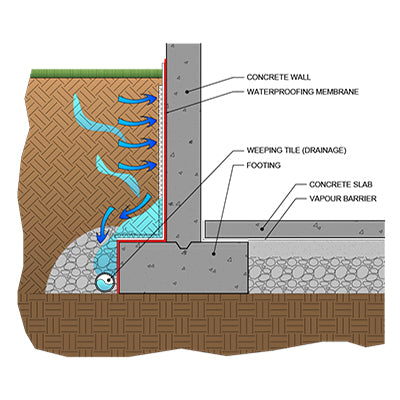
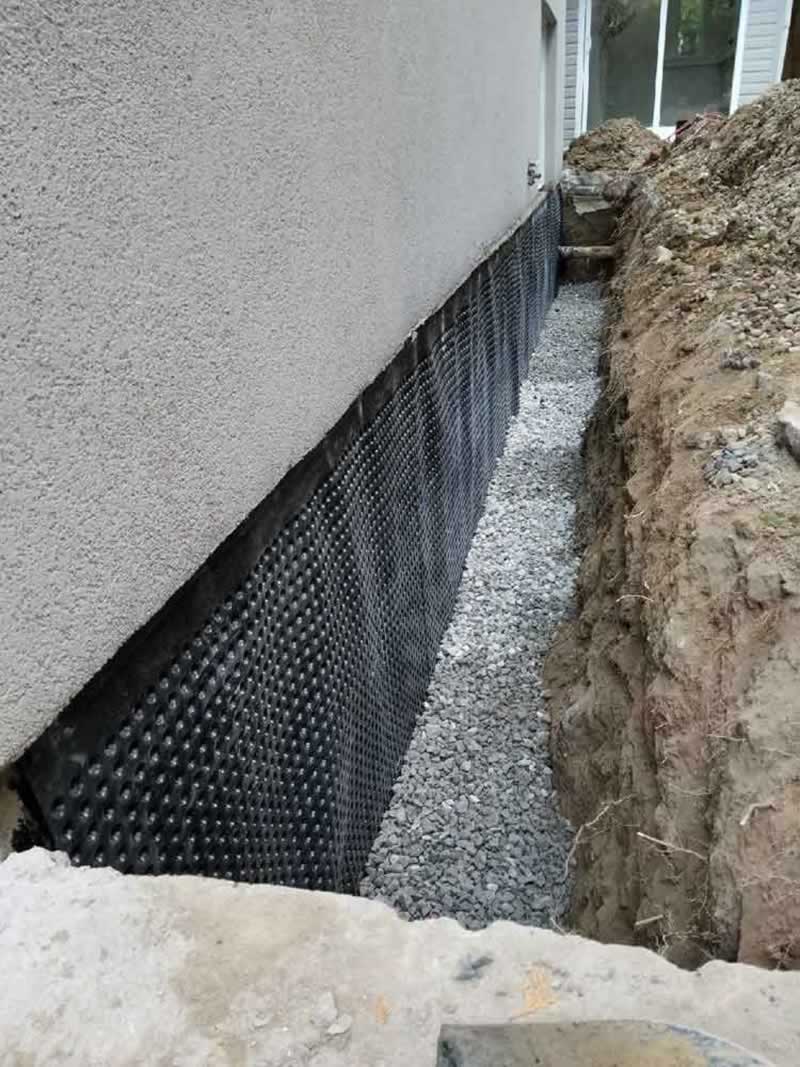
Protection from external sources of water
Exterior waterproofing focuses on preventing water intrusion from the outside of your property. By applying waterproof barriers or membranes to the exterior foundation walls, it creates a protective layer that keeps water away from the basement walls and reduces the risk of leaks and moisture infiltration.
Comprehensive coverage
Exterior waterproofing offers comprehensive coverage by addressing potential sources of water infiltration, such as groundwater, rainwater, and surface runoff. It provides a robust defense against various water-related issues, including hydrostatic pressure, soil moisture, and potential damage caused by freeze-thaw cycles. Exterior waterproofing plays a crucial role in protecting the structural integrity of your property. By preventing water intrusion, it helps minimize the risk of damage to the foundation walls, reinforcing steel, and other structural elements. This helps preserve the strength and stability of your building, reducing the potential for costly repairs in the future.
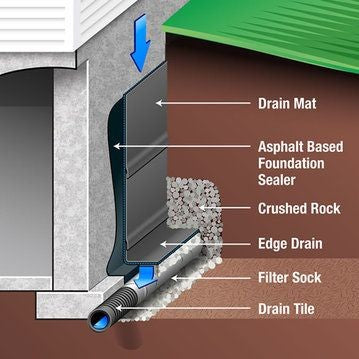
Drainage system installation
As part of the exterior waterproofing process, a comprehensive drainage system is often installed to direct water away from the foundation. This can include the installation of drain tiles or French drains, which collect and redirect water to a suitable drainage point, such as a sump pump or a safe distance from the property. A proper drainage system helps mitigate the risk of water buildup and reduces the hydrostatic pressure on the foundation walls.